Candidates can enrol for the CA Foundation Examination after completing their Class 12th Examination. Candidates can try for the CA Foundation exam with no limit. Still, they need to stay registered with the Institute of Chartered Accountants of India (ICAI) and comply with their registration norms. Registration with ICAI, completion of the registration form, payment of fees, attentive study of the offered materials, obtaining the admit card, and appearance in the exam are the steps required to take the CA Foundation exams in 2026. Read the article for more information on the CA Foundation exam registration for January, June, and September 2026, including eligibility criteria and other information.
Some key points for registration and attempts:
Continuous Registration: The candidate’s registration remains valid for 3 years once they enrol for the CA Foundation course. They can attempt the exam multiple times within this duration.
Renewal: A candidate may be required to renew their registration to remain qualified for additional attempts if they do not pass within 3 years.
Exam Frequency: The CA Foundation Exam is conducted three times a year in May/June, September, and January. Candidates can choose to attempt it in any of these sessions.
Eligibility: The candidates to be eligible for the registration of the Foundation Examination must have completed their Class 12 examinations or equivalent.
Keep in mind to keep up with any ICAI updates and information surrounding the CA Foundation May/June, September, and January 2026 Session exams. It is also advisable to check the official ICAI website or contact the branch closest to you for any updates or changes to the process.
CA Foundation Exam Dates May/June, Sept. and Jan. For 2026
Below are important dates related to the CA Foundation exam. The table provides information on registration dates, deadlines, and exam form submissions for the September, January, and May 2026 exam sessions.
| Events | September 2026 | January 2026 | May 2026 |
| Registration Dates for Forms (Registration Last Date) | May 1, 2026 (Expected) | 1st September 2025 | 1st January 2026 |
| CA Foundation Exam Form | 6th July 2026 | 3rd November 2025 | 3rd March 2026 |
| Last date to fill CA Foundation exam form(without late fees) | 19th July 2026 | 19th November 2025 | 16th March 2026 |
| Last date to fill CA Foundation exam form(with late fees) | 22nd July 2026 | 19th November 2025 | 19th March 2026 |
| CA Foundation exam | 2nd, 5th, 7th & 9th September 2026 | 18th, 20th, 22nd & 24th January 2026 | 14th, 16th, 18th, 20th May 2026 |
| Correction window will be Available | 23rd To 25th July 2026 | 20th to 22nd November 2025 | 20th To 22th March 2026 |
Latest update for Examinations for May 2026
- ICAI has officially announced the schedule for the CA Foundation, Intermediate, Final, and Post Qualification Examinations for September 2026. Read the official PDF
- Guidance Notes for Final Exams May 2026. Read the official PDF
- Guidance Notes for Intermediate Exams May 2026. Read Official PDF
- Guidance Notes for Foundation Exams May 2026 Read Official PDF
- Final May 2026 Guidance Notes for Continuing the Exhausted Exemptions – Making Exemption/s Permanent. Read Official PDF
- Requirements for Applying for Final May 2026 Exams. Read Official PDF
- Requirements for Applying for Foundation & Intermediate May 2026 Exams. Read the official PDF
- Intermediate May 2026 Guidance Notes for Continuing the Exhausted Exemptions – Making Exemption/s Permanent. Read Official PDF
- The ICAI has launched a new system that lets candidates choose their exam centre directly while filling out the online application for the May 2026 exams. Read Official PDF
- Permanent Exemption Window (Intermediate & Final) – May 2026 Important Dates. Read the official pdf
- Fee Chart for CA Foundation, Intermediate & Final Examinations in May 2026. Read the official Pdf
- Important Dates for Online Exam Form Submission in May 2026 (Foundation, Intermediate & Final) Read the official pdf
Details/Documents Required for Filing CA Foundation Exam
Candidates are required to keep things along while submitting the CA Foundation exam application form for May/June, September and January sessions –
- Valid Email address, Mobile Number, and Personal Identification Number (PIN)
- Candidate’s photo and signature in scanned form
- Fee payment method
- Duplicates of the CA Foundation registration letter for filling in the details.
How To Fill the CA Foundation Exam Form 2026
Aspiring candidates can pass the CA Foundation test and make substantial progress toward their goal of becoming a Chartered Accountant by following this step-by-step procedure. Steps to Students’ Profile Registration, ICAI SSP exam portal Login Creation, and Applying for Exam.
To log in to the ICAI SSP, visit https://eservices.icai.org and enter your login and password
and apply for the exam form
In case you do not have a login and password for SSP, you will have to create them. Make sure that the login creation process is completed before you can access the SSP exam form portal.
Eligibility to log in – Students who are aspiring to pursue CA courses or are already enrolled students of CA courses in ICAI
Steps: To log in to the SSP Portal
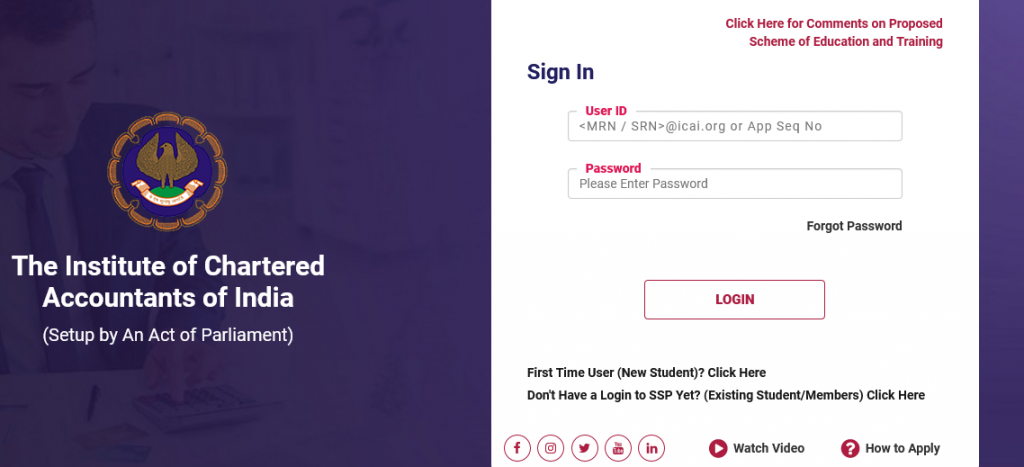
- Go to the CA Foundation exam form link https://eservices.icai.org
- The sign-in/ICAI Login form will be opened.
- To apply for profile registration of a First Time User (New Student), click on the mentioned CA Foundation exam form link
- as shown in the following image.
Existing Students: Profile Registration and Login Creation on the SSP Portal
Read Also: CA Foundation: Dates Registration, Eligibility, Syllabus, Exam Pattern
Eligibility to access this form – Already enrolled students for CA courses with ICAI, but do not have a login at the SSP
This form will be used by the CA students who enrolled before the SSP system and became
operational (May 2019 Requirements for Applying for November 2022 CA Exams onwards), and do not have a login ID and password to log in to the SSP system.
Steps: Profile Registration and Login Creation form for Existing Students
#1. Visit eservices.icai.org
Click on “Don’t Have a Login to SSP Yet? (Existing Student/Members) click here
#2. Select the current role as a Student. Enter your SRN no and Date of Birth (DD/MM/YYYY format).
Click on the ‘Validate’ button.
#3. After the validation of your student registration details, the available profile data will be
displayed. Also, the system will prompt whether the email and mobile number are already validated in your profile.
#4. If your mobile number and email ID are not validated in the system, an information screen
similar to the following will appear. You would be required to click on OK and proceed to
provide the required email ID and mobile number.
#5. If you want to change the existing email and mobile number. Then select “YES” on the ‘Do you want
to change/update your existing mobile number and e-mail ID?’ field, and fill in your correct
mobile no and e-mail ID or select NO to keep the existing mobile number and e-mail ID. (Please
Note that the phone number & email ID have to be unique, or else the system will not
proceed. Click on the Generate OTP button.
Your correct mobile number and e-mail ID are critical for communication with ICAI. Please provide your right personal mobile number and e-mail ID during registration.
You are strongly recommended not to use any cyber cafe or other person’s e-mail ID and
mobile number, as you will be sent important communications from ICAI on these contacts.
#6. The system will ask you to enter a captcha as shown below to submit the form for OTP Generation.
#7. After submission of the form, you will receive the OTP on your registered mobile number and email ID.
Please note: OTP will not be received on non-Indian mobile numbers and you will need to use the OTP
received on email
#8. Enter the received OTP and click on the validate OTP button to validate the OTP.
#9. Click on I agree, and click on the submit button to submit the form for your profile registration
and login creation.
#10. After submission of the form, the following view page appears.
Your new login details will be created and communicated to your newly registered email ID.
Build a CA and Accounting Website for Your Firm
Students’Dashboard: After login
After successful login by students, the student’s dashboard is displayed.
It contains vital information related to the student’s profile, course details, communication details, etc.
On the left-hand side, it contains the link to access the menu bar for various student life cycle
related forms and their processing status.
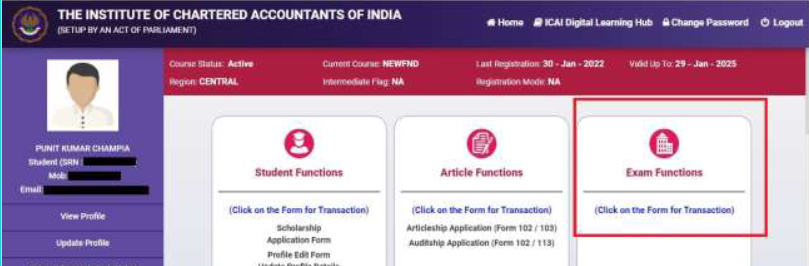
There are 3 modules currently available to the students. Student Functions, Articleship Functions, and
Exam Functions as shown in the following image.
Step Guide To How to Fill ICAI Exam Form 2026
Step 1 – To fill out the CA exam form, one has to visit ICAI.org and then click the self-service portal. Under which one do you have to fill in the password and login details?
Step 2 – Students need to click on the exam functions and then need to select the Exam Enrolment form, and click on the Foundation Exam form.
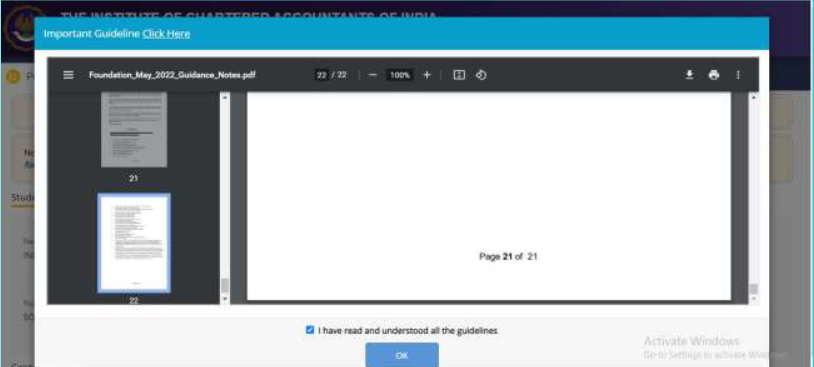
Step 3 – When the form loads, the student must go through the Guidance Notes on the pop-up screen.
Students can save and download the important guidelines. Students need to check on
“I have read and understood all the guidelines”, check box, and after that, only students can
proceed with form filling.
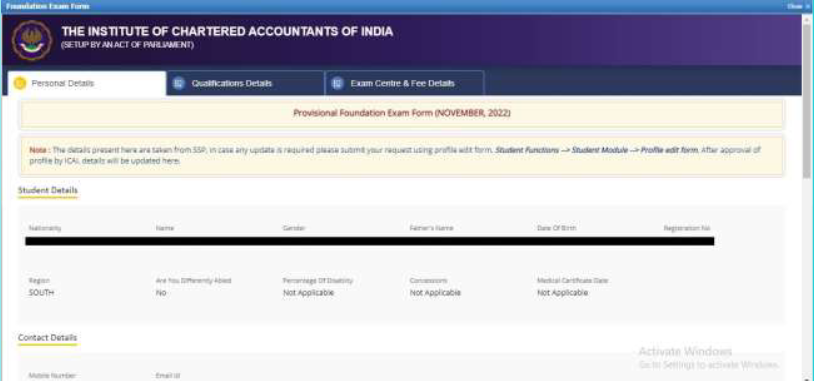
Step 4 – The student should verify the details present in the Personal Details tab, and if any
discrepancy is found, then update the same using the profile edit form. The path for the same
has been mentioned in the form.
Step 5 – Students may note that the profile changes, like Name/Photo-Sign/Qualification, go
through an approval process, which may take 2 to 7 days. Hence, you are advised to
apply early and raise a ticket in case the changes are not approved as per the above timelines
Step 6 – Once the student verifies all the details in the Personal Details tab, the student should go to
Qualification Details section by using the NEXT button present at the bottom of the Personal Details tab.
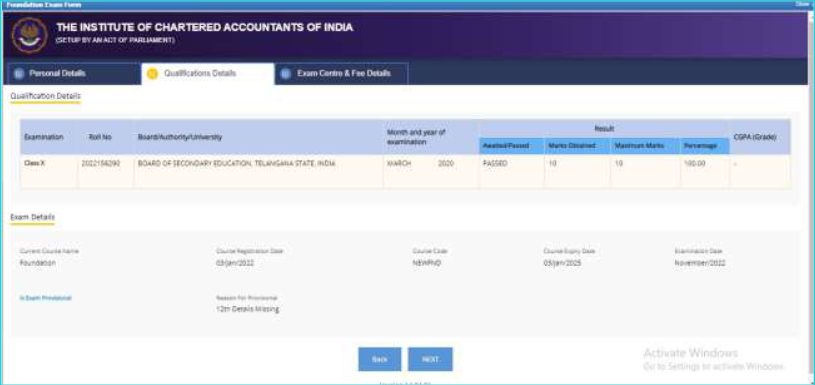
Step 7 -In the Qualification details section, students can view and verify the qualification details, and if any discrepancy is found, then update the same user profile edit form. The path for
the same has been mentioned in the form.
Step 8 – In the Exam Details section, all the necessary details are present for the foundation
examination along with the “Provisional Flag (When Y= Provisional)” case, and the reason why
The exam application has been accepted as Provisional.
Step 9 – Once the student verifies all the details in the Qualification Details tab, the student should go to
Exam Centre and Fee Details section by using the NEXT button present at the bottom of
Qualification Details tab.
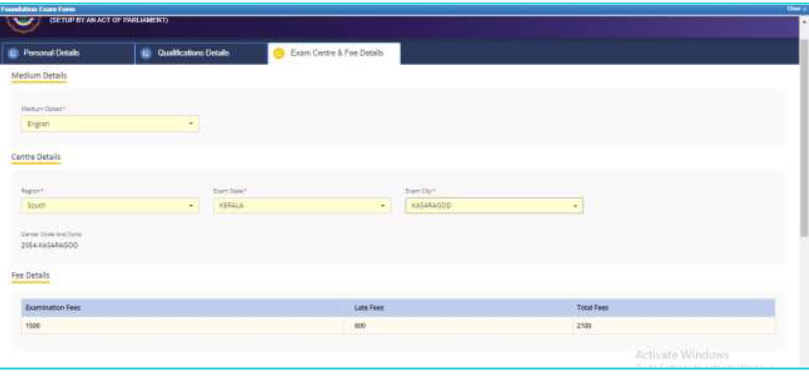
Step 10 – In the Exam Centre and Fee Details section, the student selects the medium using the
a drop-down in which the student wants to write the exam.
Step 11 – Students must select the centre details using the dropdown for Region, Exam State and Exam
The city in which the student wants to write the exam.
Step 12 – The examination fee will be automatically calculated based on the examination centre and Group. In
In the case of any late fee, the applicable late fee will be levied.
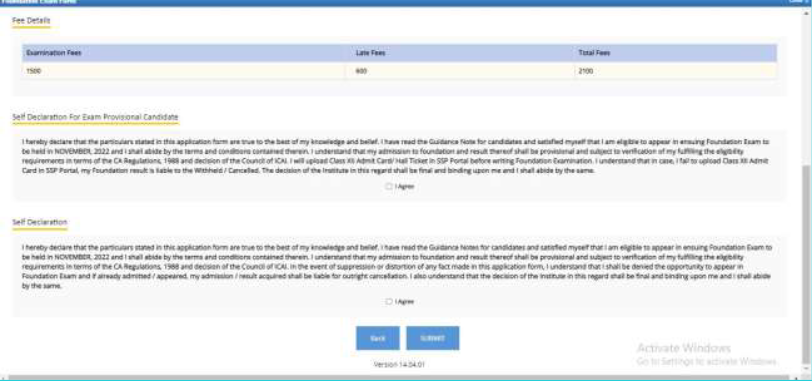
Step 13 – Before form submission, the student must read and accept the Provisional Declaration/Self
Declaration. Without accepting it, the student cannot submit the form.
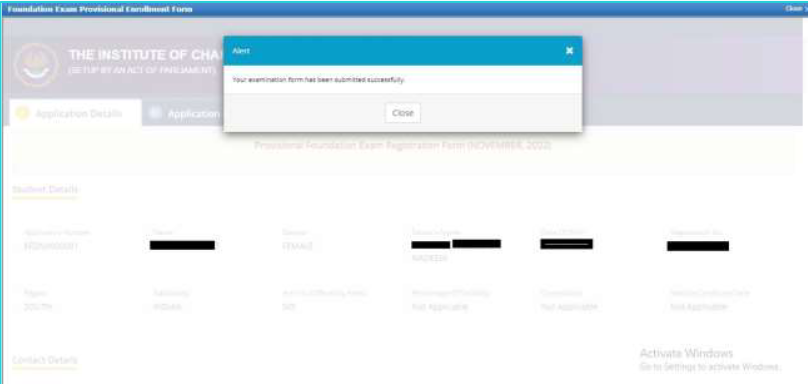
Step 14 -Once the student clicks on the submit button, the page will be redirected to the PAYTM payment
gateway page. When students can make the payment, and on successful payment, the exam
enrolment form will be submitted successfully.

In case of payment failure, student need to submit the fresh application only. If amount is
deducted for payment failure cases but not recorded as successful in SSP/exam portal, then
refund shall be granted.(refer guidance notes for rules regarding refund of fees

“Candidates who are planning to appear in the December 2022 exams are advised to check their
status at the Self-Service Portal (SSP) and be assured that they meet the eligibility criteria to be
able to effortlessly fill the exam forms at SSP” –
It’s Time To Give Professional Look to Your Accounting and Tax consultant Website
CA Foundation Exam Forms Fees
Verify that all the details, like registration number, medium of the exam, gender, and exam applied have been filled accurately before you proceed to make an online payment.
| Exam venue | Fee details |
| For Indian Centre(s) | Rs. 1500 |
| Late exam fee | Rs. 600 |
| For Kathmandu (Nepal) Centre | Rs. 2200 |
| For Overseas Centre(s) – Excluding Kathmandu Centre | USD 325 |
| Late fee for overseas centre | USD 10 |
Mode of Exam Fee Form Payment
- Net Banking
- VISA or MASTER or MAESTRO
- Bhim UPI
- Credit / Debit Card / Rupay Card
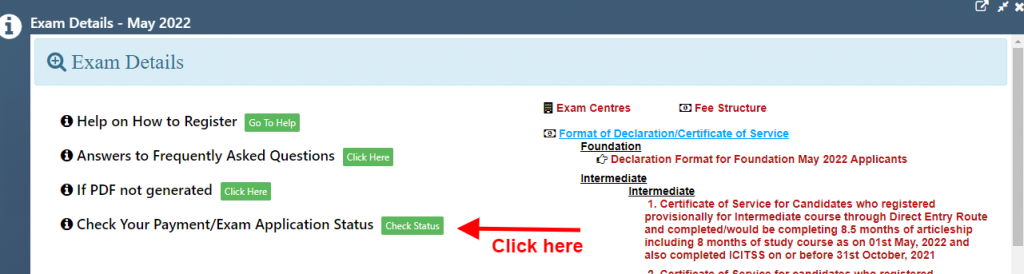
The status of payment can be viewed via the options available on the official Website icaiexam.icai.org –
“May 2026> Exam Details→ Check Your Payment/Exam Application Status”